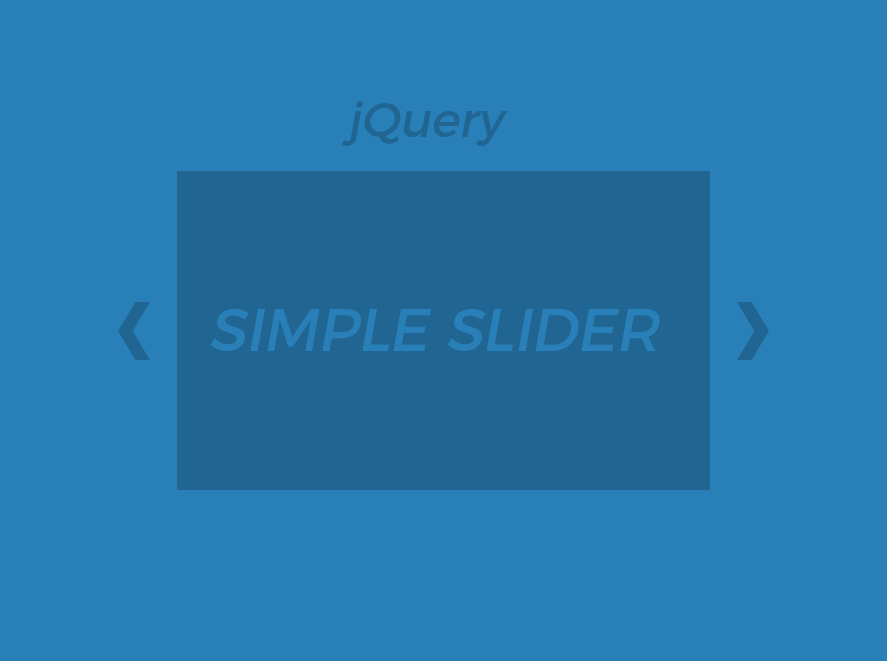
How to Create a Simple Slider with JavaScript
In our previous article, we built a simple slider with jQuery. jQuery makes DOM manipulation easy, but for something like a basic slider, loading an entire library just for a few convenience methods is overkill. In this tutorial, we’ll build a simple slider with JavaScript only, no libraries, no dependencies, using querySelector, classList, and addEventListener, which have more than solid enough browser support in 2018 to go dependency-free.
This simple slider with JavaScript will have the same features as our jQuery version: fade transitions, previous/next arrows, a pager, and autoplay. Let’s get into it.
Demo
You can check out the working demo here. The final result of our simple slider with JavaScript looks and behaves exactly like the jQuery version, just without the 87KB overhead.

1. Markup for Our Simple Slider
The HTML structure is identical to our jQuery slider. We have a main container div with id slider, a slides-container that holds all the slides, an arrows div for navigation, and a pager div to display the current slide number.
<div id="slider">
<div class="slides-container">
<div class="slide"><img src="img/img-1.jpg" alt="Slider image 1"></div>
<div class="slide"><img src="img/img-2.jpg" alt="Slider image 2"></div>
<div class="slide"><img src="img/img-3.jpg" alt="Slider image 3"></div>
<div class="slide">
<div class="text">
Proof that you can use text and it works
</div>
</div>
</div>
<div class="arrows">
<a class="prev" href="#">❮</a>
<a class="next" href="#">❯</a>
</div>
<div class="pager">
1 / 4
</div>
</div>
One difference from the jQuery version: we don’t need to include any library in our script tag. Just our own JavaScript file, placed before the closing </body> tag.
<script src="js/slider.js"></script>2. Styles
The CSS is almost the same as in the jQuery tutorial. The key properties that make the slider work are position: relative on the main container, position: absolute on each slide so they stack on top of each other, and display: none on all slides except the first.
The main difference here is that instead of relying on jQuery’s fadeIn() and fadeOut() methods, we are going to use CSS transitions for the opacity. This gives us the same fade effect, and honestly, it performs better because the browser can optimize CSS transitions with hardware acceleration.
#slider {
    width: 70%;
    height: 400px;
    margin: auto;
    position: relative;
    font-family: 'Roboto', Arial, Helvetica, sans-serif;
    font-size: 15px;
    overflow: hidden;
}

#slider .slides-container {
    position: relative;
    width: 100%;
    height: 100%;
}

#slider .slide {
    width: 100%;
    height: 100%;
    position: absolute;
    left: 0;
    top: 0;
    opacity: 0;
    transition: opacity 0.7s ease-in-out;
}

#slider .slide.active {
    opacity: 1;
}
Instead of toggling display: none and display: block like jQuery’s fadeIn/fadeOut does under the hood, we keep all slides in the DOM and toggle their opacity. The transition property handles the animation. The .active class simply sets opacity: 1, and the CSS transition takes care of the smooth fade. This approach is cleaner, more performant, and gives us full control over the animation timing through CSS rather than JavaScript.
Now let’s add the remaining styles for the text slide, images, pager, and arrows.
#slider .slide .text {
    width: 100%;
    height: 100%;
    background: #8fc6eb;
    color: #fff;
    text-transform: uppercase;
    font-size: 18px;
    font-weight: bold;
    text-align: center;
    display: flex;
    align-items: center;
    justify-content: center;
}

#slider img {
    width: 100%;
    height: 100%;
    object-fit: cover;
}

#slider .pager {
    font-size: 14px;
    font-weight: 900;
    color: #777;
    text-align: center;
    margin-top: 5px;
}

#slider .arrows a {
    position: absolute;
    text-decoration: none;
    color: rgba(255, 255, 255, 0.65);
    top: 43%;
    left: 15px;
    font-weight: 400;
    line-height: 1;
    font-size: 42px;
    z-index: 10;
}

#slider .arrows a:hover {
    color: #fff;
}

#slider .arrows a.next {
    left: initial;
    right: 15px;
}
One small improvement over the jQuery version: we added z-index: 10 to the arrows so they always stay clickable on top of the slides, and used flexbox for vertical centering in the text slide instead of relying on line-height hacks.
3. JavaScript: Making the Slider Work
Here’s where things get interesting. In our jQuery version, we used $() selectors, .fadeIn(), .fadeOut(), .addClass(), .removeClass(), and .click(). Every single one of these has a vanilla JavaScript equivalent that works in all modern browsers and even in IE10+.
Let’s start by selecting all the elements we need. Instead of jQuery’s $('#slider') we use document.querySelector(), which accepts any CSS selector and returns the first matching element.
// Configuration
var auto = true;
var pause = 7000;

// Get elements
var slider = document.querySelector('#slider');
var slidesCont = slider.querySelector('.slides-container');
var slides = slidesCont.querySelectorAll('.slide');
var pager = slider.querySelector('.pager');
var prevBtn = slider.querySelector('.arrows .prev');
var nextBtn = slider.querySelector('.arrows .next');

// State
var slidesCount = slides.length;
var currentSlideIndex = 0;
var autoPlay = null;
A few things to notice. We use querySelectorAll to get all slides, which returns a NodeList. Unlike jQuery objects, a NodeList doesn’t have convenience methods like .fadeIn(), but it does support forEach in modern browsers, and you can access individual elements by index with bracket notation.
Also, our currentSlideIndex starts at 0 instead of 1 like in the jQuery version. Zero-based indexing makes the array access simpler and more natural in vanilla JS.
Now let’s set up the initial state. We add the active class to the first slide:
// Set first slide as active
slides[0].classList.add('active');
That’s it. One line. The CSS handles the rest, because .active sets opacity: 1 and the transition animates the change. Compare this to the jQuery version where we had to call .css('display', 'none') on all other slides and then chain several methods. The classList API is one of the best additions to the DOM, and browser support has been solid since IE10 (with the exception of the toggle force parameter and multiple arguments).
Next up, the fade functions. The logic is identical to our jQuery version, just with different syntax.
function fadeNext() {
    // Remove active class from current slide
    slides[currentSlideIndex].classList.remove('active');

    // Move to next slide, or loop back to first
    if (currentSlideIndex === slidesCount - 1) {
        currentSlideIndex = 0;
    } else {
        currentSlideIndex++;
    }

    // Add active class to new current slide
    slides[currentSlideIndex].classList.add('active');

    // Update pager
    pager.textContent = (currentSlideIndex + 1) + ' / ' + slidesCount;
}

function fadePrev() {
    // Remove active class from current slide
    slides[currentSlideIndex].classList.remove('active');

    // Move to previous slide, or loop to last
    if (currentSlideIndex === 0) {
        currentSlideIndex = slidesCount - 1;
    } else {
        currentSlideIndex--;
    }

    // Add active class to new current slide
    slides[currentSlideIndex].classList.add('active');

    // Update pager
    pager.textContent = (currentSlideIndex + 1) + ' / ' + slidesCount;
}
Notice how clean this is. We remove the active class from the current slide, calculate the next index (wrapping around at the boundaries), add active to the new slide, and update the pager text. The CSS transition handles all the visual animation. No delay(), no fadeIn(), no callbacks.
We use textContent instead of jQuery’s .text(). They do the same thing, textContent is just the native DOM property.
Now the autoplay function, same logic as before:
function startAutoPlay() {
    clearInterval(autoPlay);

    if (auto) {
        autoPlay = setInterval(fadeNext, pause);
    }
}
And finally, the event listeners. Instead of jQuery’s $(element).click(), we use addEventListener:
nextBtn.addEventListener('click', function(e) {
    e.preventDefault();
    fadeNext();
    startAutoPlay();
});

prevBtn.addEventListener('click', function(e) {
    e.preventDefault();
    fadePrev();
    startAutoPlay();
});

// Start autoplay
startAutoPlay();
And that’s it. A fully working simple slider with JavaScript, same functionality as the jQuery version, zero dependencies.
4. Wrapping the Simple Slider Into a Reusable Function
Just like we did in the jQuery tutorial, it’s a good idea to wrap everything into a function so you can create multiple slider instances on the same page.
function dxSimpleSlider(selector, auto, pause) {
    auto = auto || false;
    pause = pause || 7000;

    var slider = document.querySelector(selector);
    if (!slider) return;

    var slidesCont = slider.querySelector('.slides-container');
    var slides = slidesCont.querySelectorAll('.slide');
    var pager = slider.querySelector('.pager');
    var prevBtn = slider.querySelector('.arrows .prev');
    var nextBtn = slider.querySelector('.arrows .next');

    var slidesCount = slides.length;
    var currentSlideIndex = 0;
    var autoPlay = null;

    // Set first slide as active
    slides[0].classList.add('active');

    function fadeNext() {
        slides[currentSlideIndex].classList.remove('active');
        currentSlideIndex = (currentSlideIndex + 1) % slidesCount;
        slides[currentSlideIndex].classList.add('active');
        pager.textContent = (currentSlideIndex + 1) + ' / ' + slidesCount;
    }

    function fadePrev() {
        slides[currentSlideIndex].classList.remove('active');
        currentSlideIndex = (currentSlideIndex - 1 + slidesCount) % slidesCount;
        slides[currentSlideIndex].classList.add('active');
        pager.textContent = (currentSlideIndex + 1) + ' / ' + slidesCount;
    }

    function startAutoPlay() {
        clearInterval(autoPlay);
        if (auto) {
            autoPlay = setInterval(fadeNext, pause);
        }
    }

    nextBtn.addEventListener('click', function(e) {
        e.preventDefault();
        fadeNext();
        startAutoPlay();
    });

    prevBtn.addEventListener('click', function(e) {
        e.preventDefault();
        fadePrev();
        startAutoPlay();
    });

    startAutoPlay();
}
In this version, we also simplified the index wrapping using the modulo operator. (currentSlideIndex + 1) % slidesCount wraps forward, and (currentSlideIndex - 1 + slidesCount) % slidesCount wraps backward. It’s a common pattern that replaces the if/else checks and keeps things concise.
Now you can initialize multiple sliders just like before:
dxSimpleSlider('#slider', true, 6000);
dxSimpleSlider('#slider-two', false, 4000);
dxSimpleSlider('#slider-three', true, 10000);
Make sure to call this after the DOM is ready. You can either place your script tag at the bottom of the <body>, or wrap the calls in a DOMContentLoaded listener:
document.addEventListener('DOMContentLoaded', function() {
    dxSimpleSlider('#slider', true, 6000);
});
jQuery vs Vanilla: What Changed?
If you compare this tutorial to the jQuery version, you’ll notice the overall structure and logic is nearly identical. The differences are all in the API:
$('#slider') became document.querySelector('#slider'). The $().children() calls became querySelector and querySelectorAll. Instead of .fadeIn() and .fadeOut(), we use CSS opacity transitions triggered by adding and removing an .active class with classList. Event binding changed from .click() to .addEventListener('click', ...). And .text() became .textContent.
The vanilla version is actually a bit smaller in total code, and it doesn’t require loading jQuery (which is around 87KB minified in version 3.3.1). For a simple slider with JavaScript, that’s a significant saving.
That said, if you’re already using jQuery on your site for other things, there’s nothing wrong with the jQuery approach. It’s still clean, readable, and works great. But if a slider is the only reason you’d pull in jQuery, vanilla JS is the way to go. For a comprehensive list of native alternatives to common jQuery methods, You Might Not Need jQuery is an excellent reference.
Browser Support
All the native APIs we’ve used here, querySelector, querySelectorAll, classList, addEventListener, CSS transitions, are supported in all modern browsers and IE10+. If you need IE9 support, you’d need a small polyfill for classList, but realistically, in mid-2018 that’s becoming less and less of a concern. You can always check specific support tables on Can I Use.
Common Problems & Pitfalls
Building a simple slider with JavaScript is straightforward, but there are a few things that tend to trip people up. Here are the ones we’ve run into most often.
Arrows not clickable. This is by far the most common issue. Because the slides are position: absolute and stack on top of each other, they can cover the arrow elements even though the arrows appear visually on top. The fix is simple: add a z-index to your arrows that’s higher than the slides. Without it, the absolutely positioned slides will sit in front of the arrows in the stacking context and swallow all click events.
Transition doesn’t look smooth. If you’re transitioning display: none to display: block, there will be no animation. The display property is not animatable. That’s why we use opacity instead, which the browser can interpolate smoothly. If you still see choppy transitions, make sure you’re not accidentally overriding the transition property somewhere else in your CSS, and check that the transition duration is long enough to be visible (anything under 200ms tends to look instant rather than smooth).
Autoplay doesn’t reset after clicking arrows. If you forget to call clearInterval before setting a new interval in the startAutoPlay function, you’ll end up with multiple intervals running simultaneously. This causes the slider to transition faster and faster with each click. Always clear the previous interval before starting a new one.
First slide flashes on load. If none of your slides have the active class in the HTML, all slides will have opacity: 0 for a split second until the JavaScript runs and adds the class. You can avoid this by either adding the active class directly in your HTML on the first slide <div class="slide active">, or by making sure the script runs synchronously before the page paints (place it right after the slider markup).
Multiple sliders interfere with each other. If you use the flat variable approach (not wrapped in a function) and try to create two sliders on the same page, the second querySelector('#slider') call will just select the first slider again, or worse, your variables will get overwritten. Always use the reusable function pattern from section 4, and give each slider a unique ID.
This slider covers the basics, but there are several improvements you could make depending on your needs. Touch and swipe support for mobile devices would be a natural next step. You could add keyboard navigation by listening for arrow key events, or implement dot-based pagination instead of the simple “1 / 4” pager. Another nice touch would be pausing autoplay when the user hovers over the slider.
Complete code can be found here Download
Need a custom slider or interactive component built for your project? At Devexus, we build performant, scalable web applications with React, Next.js, Laravel, and vanilla JS. Get in touch and let’s talk about what you need.